All posts by liam

So what are all those blinking lights doing?

As the ISS-Above’s are coming online I am getting a few questions about what all the blinking lights mean.  Just in case you missed the email attachment or the printed document (in the Complete ISS-Above) here is the information about all that.

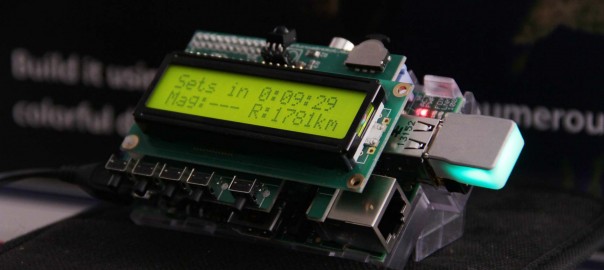
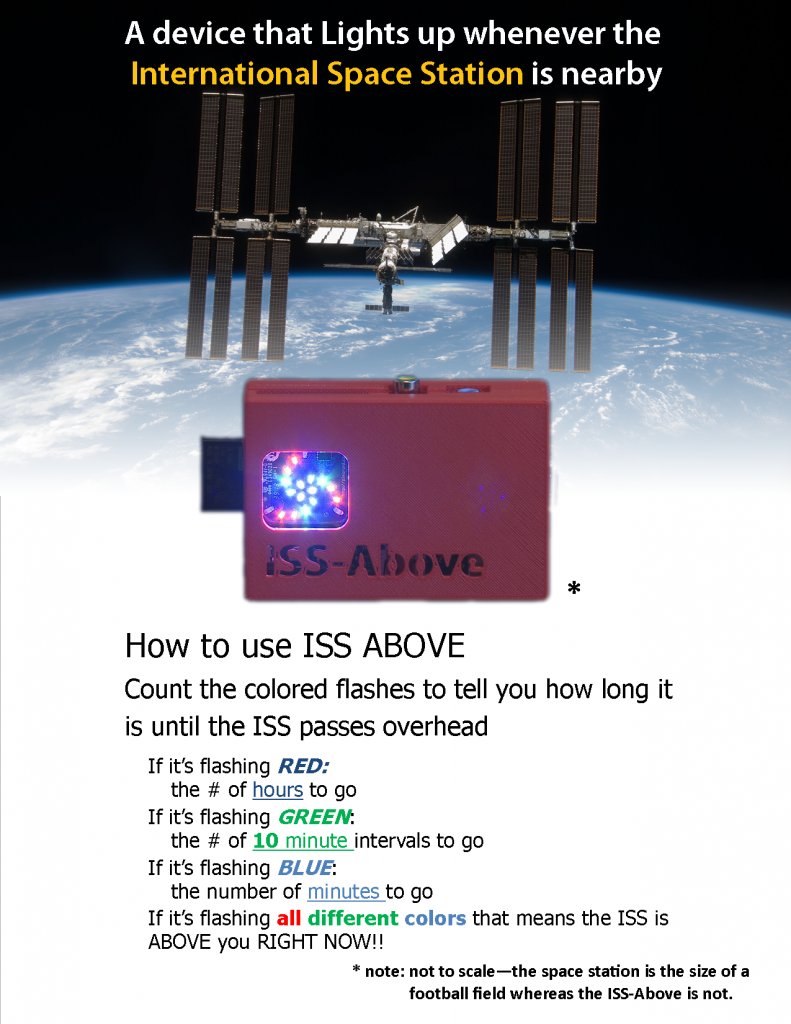
If you have an ISS-Above with a PiGlow / Ledborg / Blinkstick or Blink(1) they indicate an approximate time until the next pass of the ISS by flashing either red (more than an hour) green (less than one hour) and blue (less than 10 minutes).

ISS-Above-HOW-to-use-PiGlow


So you want to connect your ISS-Above to Wifi?

Yes – the ISS-Above can connect to your home WiFi network – here is how you can do that.

You have probably seen the two or four USB ports on the device near to the ethernet port.   You can purchase a pretty inexpensive WiFi “dongle” that can plug in to one of the USB ports.

BEWARE – not every WiFi Adaptor is compatible with the Raspberry Pi (the computer inside the ISS-Above).   If you google search “Wifi Adaptors compatible with Raspberry Pi” you will find some…. or you can just buy this one from Amazon.

Of course to make these settings for the WiFi adaptor you must FIRST connect your ISS-Above to your home router via a wired ethernet connection (which you have done already right?)

Access the wifi setup file via the ISS-Above’s in-built web admin system by clicking on:

http://issabove.local/wifi and log in with the default web username of admin and password nasa

(note: that issabove.local link only works on some networks – if that doesn’t work you will need to locate the actual IP address of your device.  As long as you have a recent version of ISS-Above this will be displayed on the lower left corner of your TV screen).

Just configure the ssid and pwd in the file shown and click Save Settings.

Now remove the Ethernet Cable.

reboot the device from this page

http://issabove.local/off

During boot up you should see the WiFi dongle’s activity light start blinking (rapidly) to indicate it has established a connection to your wifi.

Note the IP address will have changed when you switch to using the WiFi.   If for any reason the connection is not successful please re-connect the wired ethernet cable and check your settings again.


You need to backup your ISS-Above SD Card as SOON as you can.

No Poweroff Button

As you will have already found out the Raspberry Pi (the computer at the heart of the ISS-Above) does not come with an on-off switch.

Just like any computer – they don’t like it when the power is just pulled from them without doing an orderly shutdown.

If the power is lost suddenly this can (sometimes) corrupt the SD card containing the ISS-Above code).

The best solution is to clone / backup the SD card to your computer.  This will allow you to quickly restore the setup to your SD Card if it ever gets corrupted.  This will only take 10 minutes and is HIGHLY recommended (otherwise tears and upset might be in your future).

You will need 8GB of space for the backup (the size of the SD card)
– although you can Zip (compress) the backup file for safekeeping and the file will be about 800Mb in size).

If you have a windows based computer follow these instructions.

If you have a Mac use these instructions.

How to backup your ISS-Above SD card (Mac)

iss-above-on-SD-cardBacking up your SD card image is the SMARTEST thing you can ever do.

This will allow you to quickly restore the setup to your SD Card if it ever gets corrupted.  This will only take about 10 minutes and is HIGHLY recommended (otherwise tears and upset might be in your future).

You will need 8GB of space for the backup – although you can Zip (compress) the backup file for safekeeping and the file will be about 800Mb in size).

I am not a Mac user – so I have no personal experience of the following … but hopefully this will make sense to you.

I have heard of two approaches.

The first approach uses  “command line” tools you enter in the “Terminal” window of the Mac.  The other approach uses a free tool called Pi Copier and to backup the card and Pi Filler to write the saved image back to your SD Card.  You can download both utilities here.

This is what you do with the command line to clone your SD card

On Mac, you can also use the standard dd tool with a slightly different syntax:

dd if=/dev/rdiskx of=/path/to/image bs=1m

Where /dev/rdiskx is your SD card.

(using rdisk is preferable as its the raw device – quicker)

To find out which disk your device is type diskutil list at a command prompt – also, you may need to be root – to do this type sudo -s and enter your password when prompted.

(note:  these instructions modified from this original article)

This is a quick “how to” on restoring a backed up image to your SD Card

Plug the SD Card into your MAC

Go to Spotlight (the little magnifying glass on the top right of your MAC), type Terminal, and press Enter

Now the rest of the commands are done in the Terminal

Type:
sudo bash and press enter

Type in your password to get the # prompt

Type:
cd /raspberry-pi/backups and press enter (or wherever you placed the backup img file)

Type
df -h and look for your SD Card. My card is listed as /dev/disk1s1. Once you know which card is your SD Card type

diskutil unmount /dev/disk1s1 (or whatever your SD Card is listed as)

note:  I am not a Mac user but I note the commands below reference /dev/rdisk1 – I am not sure if that is the correct name for the SD card (it might be… but it seems a little odd based upon the instructions in the line above this)

dd bs=1m if=/raspberry-pi/backups/issbove.img of=/dev/rdisk1 and press enter

your SD Card will now be restore the backup

Once the backup is complete type:
diskutil eject /dev/rdisk1 (change rdisk1 to whatever is appropriate for your SD card)

This part of the instructions taken from this original article.
How to backup your ISS-Above SD Card (Windows)

iss-above-on-SD-cardBacking up your SD card image is the SMARTEST thing you can ever do.  

This will allow you to quickly restore the setup to your SD Card if it ever gets corrupted.  This will only take 10 minutes and is HIGHLY recommended (otherwise tears and upset might be in your future).

You will need 8GB of space for the backup – although you can Zip (compress) the backup file for safekeeping and the file will be about 800Mb in size).

If you have a windows based computer follow these instructions.

Cloning the SD card is simple. Just follow these steps.

    1. Download and Install Win32DiskImager (If you’re on OS X or Linux, you’ll have to use the dd command as described here instead of these steps).
    1. In the “Image File” box, enter the path of your soon-to-be image file. For example, I put mine in C:\Users\Liam\images\issabove.img
    1. Under the “Device” box, select the drive letter for your SD card.
    1. Click the “Read” button to create the image file from your card.
    1. The program will begin reading the card.
  1. When it’s done creating the image file (it may take as long as 10 minutes), you can eject your SD card and put it back in your ISS-Above/Raspberry Pi. Keep that IMG file in a safe place.

Now, if anything ever goes wrong with the ISS-Above code image you can restore your fully-set-up image using the reverse instructions:P

    1. Insert the SD card back into your computer.
    1. Open Win32DiskImager again and browse for your image file you saved previously. Select your device from the Device dropdown just as you did before.
    1. This time, click “Write” to write the image to the SD card.
  1. When it finishes, eject the SD card and re-insert it into your ISS-Above. When you boot it up, it should be in the exact same state it was in when you first cloned the SD card.

Just think of this as the BIGGEST gift you can give your future self. To help you more, read about the best micro sd card from Gadget Reviews, read more reviews to enhance your knowledge.

(note:  these instructions modified from this original article)

Yes – THE @BadAstronomer (Phil Plait) has an ISS-Above

It’s only fitting.. as in a way Phil is responsible for me developing the ISS-Above.  You see – three years ago he posted a link to a project he heard about called ISS-Lamp (which actually became a Kickstarter called ISS-Notify).    

badastronomer-iss-lamp


You will even see on that page a comment I MADE about the article.

I followed that link in June 2011 and became a backer of THAT project.   Three years later – and no sign of that device – so I decided to build my own version (of very different design and capabilities).

I remembered Phils interest in that project – and his comment about his (lack of) soldering skills (something we share in common).

badastronomer-iss-lamp-02

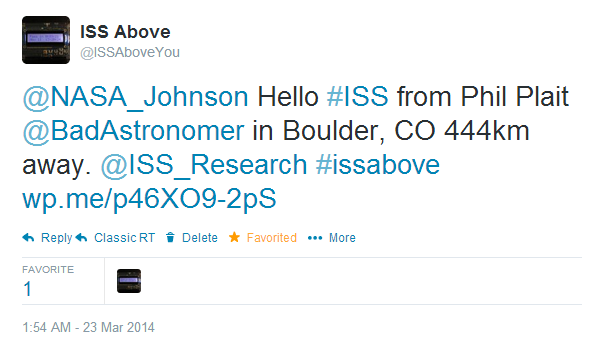
So I sent Phil his ISS-Above earlier in the month – and he must have turned it on today.. as it has just started to send Tweets when the ISS passes by Boulder, CO.

badastronomer

How flipping nerdawesome is that?


As promised the release code now supports @Raspberrypiface C&D plus the Blink(1) from @thingm

Before the ISS-Aboves are shipped I have been adding a lot of much needed features to the code – one thing I promised during the Kickstarter was to include support for a couple of new display devices.

I am pleased to announce the release code will support the PiFace  Control and Display which is an add-on 16 char x 2 line display – plus it will also support the Blink(1) from ThingM.

AWESOMESAUCE!

Video will be posted later.

Archive of the @TWiT tv Coding 101 special all about the ISSAbove

This is the archive of the Episode 9 of the TWiT.tv Coding 101 special all about the ISS-Above.   The show was recorded at their studios in Petaluma, CA on March 14th and then broadcast on the live programming channel (as a pre-recorded special of course) at 1:30pm PDT on Thursday March 20th.

Further information on this episode is here.

Thank you TWiT & Padre & Sharon it was such an honor to be invited on to your show!

Watch the @TWiT Coding 101 special all about the ISS-Above at 1:30pm PDT Thursday

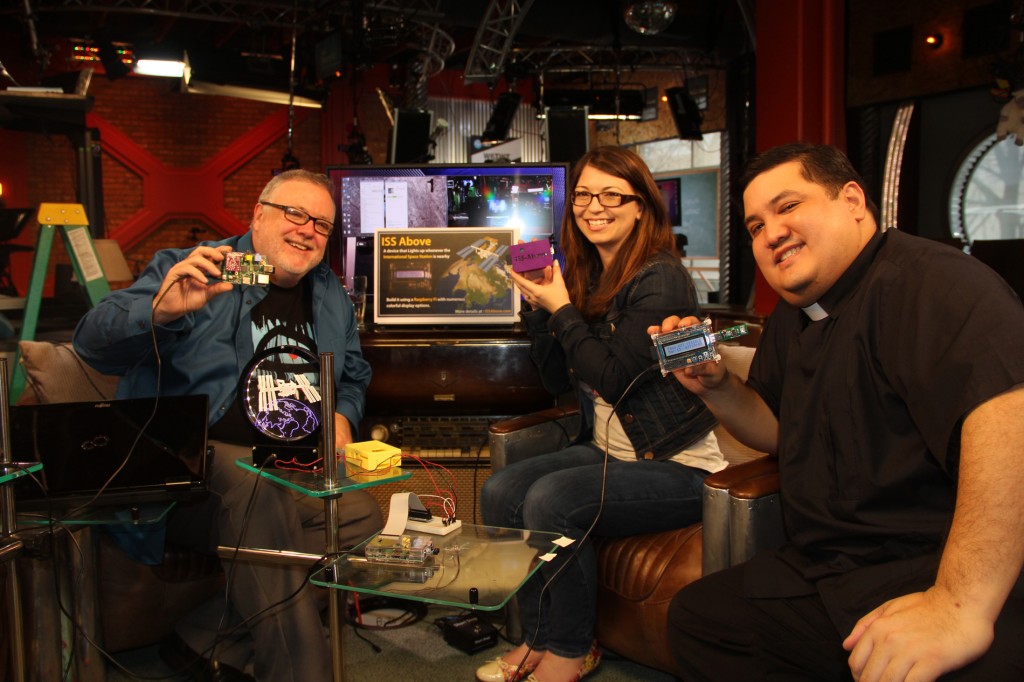
code1400_0Last Friday (March 14th) I was the guest on a special episode of TWiT.TV’s Coding 101 video podcast. The episode will be played out live tomorrow at 1:30pm PDT on http://live.twit.tv.
I’ll be on their live chat if you have any questions.

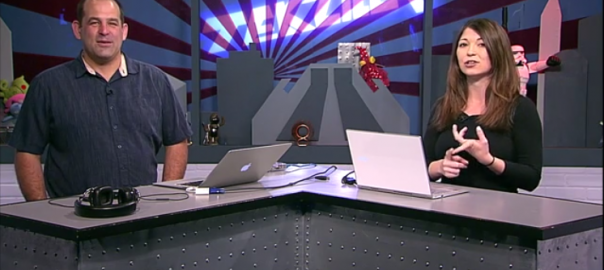
At TWiT.TV studios with the hosts of Coding 101 - Shannon Morse and Fr Patrick Ballecer (Padre).

At TWiT.TV studios with the hosts of Coding 101 – Shannon Morse and Fr Patrick Ballecer (Padre).

These episodes are usually 30 minutes but it went nearly an hour (we covered a LOT of information). I believe they will be showing it all – and it will be available afterwards as a downloadable podcast or on-demand video on Youtube (I’ll share the link when that is available).

A little “backstory” here. I am an avid watcher of the TWiT.TV network – so it was an absolute and total honor for me to be invited up to the TWiT studios in Petaluma,CA. I enjoyed every second I spent up with TWiT and I hope I get invited back.

Patrick Norton and Shannon Morse - host of Tekzilla

ISS-Above featured on @tekzilla video podcast by @Snubs – one of “5 Awesome Raspberry Pi Builds”

tekzilla-01The ISS-Above was featured in the Tuesday 18th show of Tekzilla “5 Awesome Raspberry Pi Builds”

I met Patrick Norman briefly at the studios of TWiT.tv in Petaluma, CA last week when I was being interviewed on a special feature show all about the ISS-Above.  Shannon Morse was the co-host for THAT show on TWiT and was so inspired by the project that she wanted to feature it on Tekzilla as one of these 5 Awesome Raspberry Pi tricks.

The ISS-Above is featured 2min 33sec in to the show.

I particular loved Shannon’s passion and interest in the whole ISS-Above project and I love how she showed almost all of the features including the web site app I built on the Pi.

Thank you Shannon!

More information in the FULL EPISODE